Oven Fried Chicken (KFC Copycat)
This post may contain affiliate links. Please read my disclosure policy.
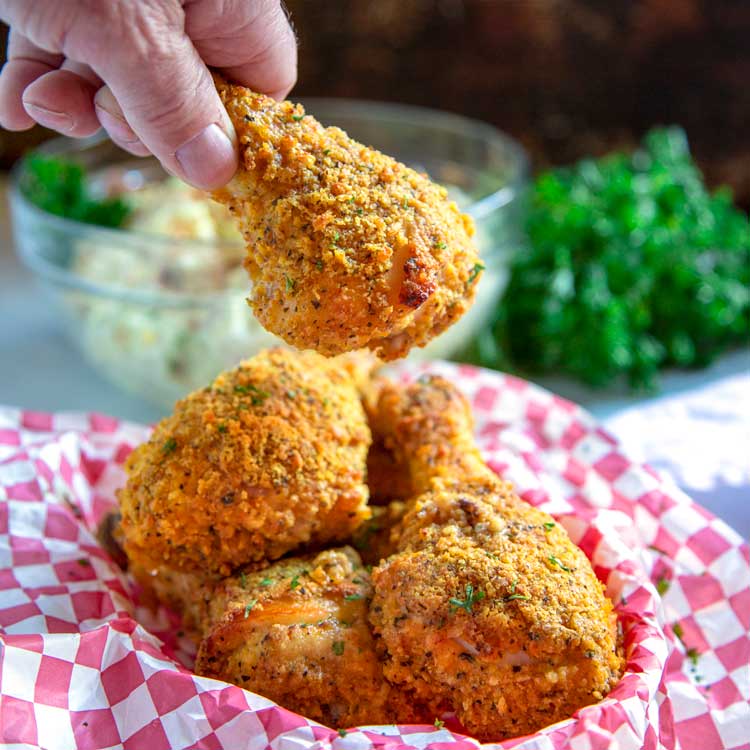
My recipe for oven fried chicken has everything you love about crispy chicken with way less hassle. Chicken is marinated in buttermilk, dredged in a batter with 11 herbs and spices, then baked to crispy perfection. This baked version is easier, healthier, and loaded with just as much crunch and flavor!
This recipe for oven fried chicken is one that I had been working on perfecting for a long time. Through much trial and error, I finally came up with the winning formula back in 2014. I’m sharing this again with new updated information, photos and a new video below in the recipe card to see how to make this.
Like any decent KFC copycat recipe, this recipe features a blend of 11 zesty and robust herbs and spices. Instead of going into the deep fryer, however, this chicken gets rendered and crispy right in the oven. This method leaves you with tender, juicy meat on the inside and a delightful crunchy exterior. Plus, it makes both cooking and cleanup easier!

Table of Contents
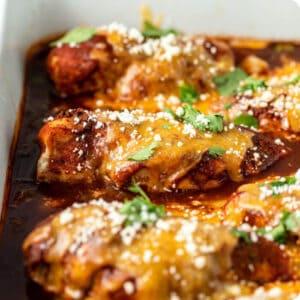
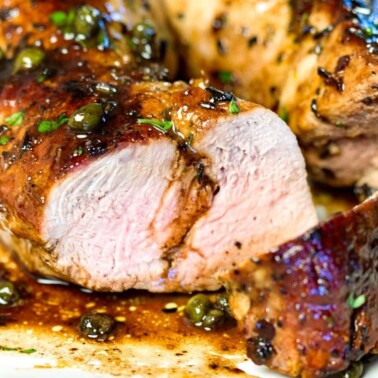
For more tasty chicken recipes, check out my Habanero Apricot Chicken, Baked Cubano Chicken, and Creamy Chicken Madeira.

- Chicken – I like to use bone-in, skin-on cuts for this recipe, and I use all the different pieces. Using boneless chicken breasts is also an option, but you will need to decrease your cooking time to 10 minutes per side.
- Buttermilk – Keeps the chicken tender and moist while helping the breading stick.
- Panko Breadcrumbs – These light, airy bread crumbs add an extra layer of crunch.
- Butter – Added to the baking pan, this adds an extra layer of crispness and flavor.
- 11 Herbs and Spices – A combination of salt, white pepper, black pepper, celery salt, Italian seasoning, garlic, mustard, paprika, ginger, turmeric, and cayenne make this a true KFC copycat recipe.
- Baking Powder – Gives the seasoning mix an added crunch factor.

To double dip and dredge or not?
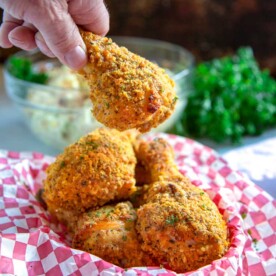
- The image above and shows the seasoning and breading I came up with although the photo shows the batch that I double dipped. As in buttermilk marinated chicken, then shake it off, dredge in the seasoned flour and then back in the buttermilk with an added beaten egg and dredged again. Double dipped and ready to bake. Melted butter gets drizzled over each chicken piece and in the oven they went.
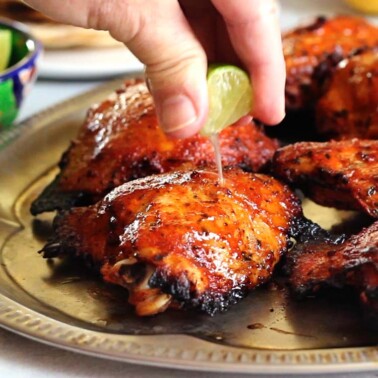
- What I found out was this double dredge technique is great if your actually frying the chicken (yes, I tested it that way, too!). It was good (see image below), though the breading was too much and got slightly steamed on the inside while baking. It was crunchy on the outside, but half of it slide off when taking a bite. Not that crunch-tastic fried chicken feel I was looking for.
- While it did indeed taste great, I adjusted the paprika and black pepper and used white pepper for the next batch and liked that better as well only doing one dredge. To get the extra crunch my secret is to add some baking powder to the dredge.
- I prefer how the recipe is listed below in the recipe card (watch the video!), but feel free to experiment if you like!

- Marinate the Meat. Place all of the chicken pieces, skin intact, in a sturdy ziploc bag. Pour the buttermilk into the bag and squeeze out any excess air. Use your hands to massage the buttermilk into the chicken, then place the whole bag in the refrigerator to marinate for at least 30 minutes and up to several hours.
- Mix the Seasoning. Preheat the oven to 425 degrees F. In a medium bowl, whisk together the flour, baking powder, panko, and 11 herbs and spices. Set the bowl aside.
- Batter the Chicken. Place a 13×9 inch pan in the oven to get hot for at least 15 minutes. In the meantime, remove the chicken from the buttermilk, shaking off any excess. Then, use one hand to dredge each piece in the seasoned flour mix, coating on all sides.
- Transfer to Baking Dish. Drizzle the melted butter into the bottom of the heated pan and arrange each piece of chicken, skin side down, in the pan. Make sure to leave plenty of room so they fry rather than steam.
- Bake Until Crispy. Keep the pan uncovered and bake the chicken for 12 minutes. Flip the pieces over, return the pan to the oven, and bake for another 12 minutes. You may need to add more time for larger pieces, but your chicken will be done when it reaches an internal temperature of 165 degrees F.
- Serve. Remove the chicken from the oven and let it rest for at least 5 minutes before diving in.

Share this recipe on Pinterest!
Love this recipe? Share it with the world on Pinterest.
To get the crispiest, crunchiest fried chicken possible, be sure not to overcrowd the baking pan. Air needs to be able to circulate around each piece to get the oven-fried effect we are aiming for.
Make sure that your oven is fully preheated and set to 425 degrees F. Cooking at too low of a temperature will also lead to less-than-crispy results. Don’t forget to preheat the baking pan too!
When dredging and battering your chicken, be sure that you shake off any excess liquid and leave only what you need for the breading to stick.
Since this is a KFC copycat recipe, I like to pair it with homemade versions of some of my favorite KFC sides like Mashed Potatoes, Brown Gravy, and Biscuits.
Oven fried chicken is also tasty with classic comfort foods like Baked Mac and Cheese or with lighter sides like a Classic Caesar Salad. The possibilities are endless!
Cooked leftovers will last for 3-4 days in the refrigerator when stored in an airtight container.
If you end up with lots of leftover fried chicken, freezing is also an option. Arrange cooked pieces on a baking sheet, then place the entire sheet in the freezer and let the chicken flash freeze for about an hour. After that, you can transfer the pieces to a freezer-safe bag and store them for 3-4 months. Be sure to label and date!
When it comes time to reheat the frozen chicken, preheat your oven to 350 degrees F. Place the pieces in a single layer on a baking sheet and bake for around 30-40 minutes, depending on the size of your portions.

Subscribe to my Newsletter, follow me on Facebook, Pinterest, Instagram and YouTube for all my latest recipes and videos.
Oven Fried Chicken (KFC Copycat)
Ingredients
- 4-5 lbs chicken (See Note 1)
- 1 cup buttermilk
- 1 cup all purpose flour
- 1 cup Panko breadcrumbs
- 4 tbsp butter melted
Seasoning Blend
- 2 tsp white pepper
- 1 tsp celery salt
- 1 tsp Italian seasoning
- 1 tsp salt
- 1 tsp garlic powder
- 1 tsp black pepper
- 1 tsp dried mustard
- 1 tsp paprika
- 1 tsp ground ginger
- 1/2 tsp baking powder
- 1/4 tsp turmeric
- 1/4 tsp cayenne
Instructions
- Place the chicken parts with the skin on in a plastic bag and pour the buttermilk in to coat. Squeeze the air out of the bag and seal. Massage the chicken and buttermilk with your hands to coat evenly and allow to marinate in the refrigerator for 30 minutes minimum up to several hours.
- Preheat your oven to 425°F. In a medium sized bowl using a whisk, mix together the flour, Panko, baking powder and 11 herbs and spices. Set aside.
- Place a 13×9” baking dish in the oven to get hot for at least 15 minutes (See Note 2). While pan is heating up remove the chicken from the buttermilk, shaking off excess, and dredge in the seasoned flour mixture (See Note 3), coating on all sides with one hand.
- Drizzle the melted butter in the heated baking dish and arrange the chicken pieces skin side down on top of butter (with plenty of room on each side so they “fry” not "steam").
- Bake for 12 minutes, uncovered. Carefully turn the chicken pieces over and bake another 12 minutes or until internal temperature reads 165°F depending on the size of your chicken. (See Note 4) Remove from oven and allow to rest 5 minutes and then serve.
Video
Notes
- I use all parts of a chicken fryer (breasts, wings, thighs and legs). The photos show 6 chicken drumsticks only.
- Avoid glass bakeware as oven temperature and adding of liquid (melted butter) is not something advised per most manufacturers instruction on care.
- When dredging I keep one hand for the wet part and the other for the dry part. This avoids getting clumpy fingers on both hands.
- If using boneless chicken breasts bake/fry 10 minutes per side instead of 12.
Nutrition
The information shown is an estimate provided by an online nutrition calculator. It should not be considered a substitute for a professional nutritionist’s advice.


I followed this recipe and when I flipped the chicken after 12 minutes the skin fell off. What did I do wrong?
Hi Nicole. On all of them? That’s never happened to me, maybe one every here and there (I do make this often), but I am just careful when turning. These are not a wet battered chicken as you know, so just be sure to press the coating on the buttermilk soaked chicken. My only thought is there was still too much of the buttermilk (instruction detail shaking excess off prior to coating) so maybe that was the issue? Thanks!
If I don’t have butter I will regular milk work?
You can make buttermilk easy from regular milk. Add a little lemon or vinegar
Thanks Heather!
Yes it will, but the buttermilk helps tenderize the chicken. There is a way though: Pour 1 cup of milk into a bowl. Take one small fresh lemon or white vinegar. Stir in a tablespoon or two of lemon juice OR vinegar into the bowl with the milk. Stir to combine. I hope this helps.:)
Fabulous recipe. Only thing I did different was used boneless skinless chicken thighs and used all black pepper since I didn’t have white. I will properly cut back on the cayenne just a smidge next time since I’ve a toddler in the house. Definitely a keeper and will be sharing with others
Thanks Katie, so glad you enjoyed this one. Thanks too for taking the time to come back and let me know. Cheers! 🙂
What level should oven rack Be?
Bottom or middle?
BTW I used gluten free flour and GF panko my 2nd time making it…MY husband loved it
Hi there Ro, I put the rack in the middle. Thanks for the GF tips!
This chicken looks amazing. But I was kind of shocked when I saw the fat content. After doing some research, the fat content you show in your nutrition info is considerably higher (twice as much and much more if w/o the skin) than if actually fried. Very disappointing because I’m all for baking instead of frying and have done so on many occasions with different foods. Could your info showing fat content at 31.5 g be a typo? Admittedly, along with the obvious health reasons, the lack of grease splatter and clean-up when baking instead of frying is a HUGE plus.
Hi Janet. Just received your email after hiking with my dogs and am now responding to this comment as well. It’s Sunday so I am not one to be near my computer all day as one day a week is for me to enjoy my family.
First things first. Thanks for coming by the site to comment and let me know your thoughts. Secondly I welcome all comments, it’s just when it’s your first time commenting on the site it is held until approved, so it was never published and quickly removed as you mentioned in your email. I have to manually approve it then you are free to comment in a constructive way on any of my recipes. Thirdly, after looking at most oven baked “fried chicken” recipes out there, and many from larger, well know company sites like Purdue or Pillsbury the numbers for these are all over the place. One thing I noticed was the bigger company site only show you a Sat Fat number, not Total Fat. Another I noticed is they use a high number of servings too, which in turn lowers their numbers. I am a very transparent site and give real numbers with often times big proportions, so numbers will vary.
My thoughts on the high Total Fat are the numbers come not only from the skin on chicken (which it needs), but the buttermilk it is soaked in, which is not all consumed, but taken into account for nutrition tabulation. Another thing is that you could lower the tablespoons of butter to “fry” the chicken in, which also does not completely get consumed as it’s on the bottom of the baking pan. I hope this helps! Enjoy the rest of your weekend, too. Cheers! 🙂
Thank you Kevin. And yes, your comments were very helpful. I still wish the fat content were lower, but that won’t stop me from making your oven fried chicken. And there’s still no greasy mess to clean up! But let’s face it, fried (or oven fried) chicken is a treat, and probably not something most of us make every week, so the higher fat content is a small price to pay. I’ll be making this soon. Thanks again.
Excellent, I hope you enjoy it, too!
Hi Kevin. Made this recipe last night and may I just say OMG! While it didn’t remind me of KFC it was insanely delicious. Will definitely make again.
Super happy you enjoyed this one Melissa. Thanks too for coming back to let me know.
Hi Kevin,
After searching the net for oven fried chicken recipes I came across your “My Oven Fried Chicken (KFC Copycat) ” recipe, and made it for the first time last night. Was so glad I did!
My family and I absolutely loved it! The chicken was as crispy as if it was fried, and it was so delicious! I had to have it again for breakfast this morning. This is definitely now my go to recipe from now on for baked or fried chicken. I’m also anxious to try some of your other recipes.
Thanks so much for taking the time to come back and let me know Sherry! 🙂
such an excellent recipe!! However mixed an egg in the buttermilk Reserve painting I took the chicken out scramble 2 eggs mixed with the reserve buttermilk. Redged the chicken in that mixture before breading I used chicken legs and thighs had to cook teeny bit longer! Chicken chrisp delicious and moist!
Thanks for taking the time to come back and let me know Helen! Glad you enjoyed this one. 🙂
Thank you for this recipe. I’ve made it a few times now and it never fails (even when I accidentally left out the ginger or when I couldn’t find buttermilk so used yogurt). I use chicken thighs, so cook for about 40 mins altogether. The coating is always crispy and the chicken is always tender. It also cooks at the same temperature as my oven fries recipe so couldn’t really get more perfect. Everyone is always so impressed and never believes that it’s not fried.
Thank you so much.
Oh reading comments like this always makes my day! Thanks so much for taking the time to come back and let me know Paula!
What kind of bake-ware where you using?
In my oven, I had a foil lined metal cookie sheet that was just about perfect at the 24 min mark, and a second foil lined 2 in deep metal pan that needed considerable more time – I had it in for about 15 more minutes because the internal temperature wasn’t high enough. In my case, that wasn’t a problem as the first batch was served and the second batch was ready for anyone’s second helping (I doubled the batch).
Everyone loved it, without even telling anyone where I got the recipe It was mentioned that it tastes like KFC.
Thank you Kevin!
I use whatever baking dish is not in use. I have 2 13×9″ ceramic baking dishes and 1 13×9″ baking stoneware (methinks it’s an old Pampered Chef one). I haven’t used a baking sheet as I thought the sputtering as the chicken bakes in the butter and the fat renders would be too messy. So glad you all enjoyed this one Keith. Thanks for taking the time to come back and let me know. Cheers!