Sourdough Starter
This post may contain affiliate links. Please read my disclosure policy.
Sourdough Series – Part 1
For this homemade sourdough starter recipe I’ll be stepping you through how to make a sourdough starter from scratch. I have been putting this one off for months! We have made breads, buns, biscuits, pancakes, waffles, and now bagels and I realized I’ve never posted a recipe for a sourdough starter itself. Now I can finally share with you some other recipes, but it all starts with this sourdough starter!
What is a Sourdough Starter?
The starter (or sometimes called a sponge) is a flour and water mixture that contains the yeast used to rise the bread. Wild yeast is present in all flour and the air. Sourdough starter has enough yeast in it so you do not need to add packaged yeast. Creating your own starter to use for sourdough baking is easy and I will explain how here.
How to Make a Sourdough Starter
The interesting trick is to use potato water. Yep, potato water, although plain water will work, too. Potato water is the water that potatoes have been boiled in. The potatoes release starch into the water as they cook. The potato water can then be used as a substitute for plain water and it makes your bread super moist. I’ve also heard of using pineapple juice. There are all sorts out there, but here is my version.
- To make potato water, wash and peel 2 to 3 potatoes. Cut into cubes and add to pot. Cover with water and boil for about 10-15 minutes or until potatoes are soft. Drain potato water into a liquid measuring cup. Let cool to warm before using in your recipe. Use cooked potatoes for another use.
- Mix the 1 part flour (by weight, 8 ounces) to 1 part (potato) water (by weight, 8 ounces) along with salt, honey and stir together in a clean and sterile container (use only glass, glazed ceramic or crockery to hold your starter. No metal or plastic) that can hold two quarts. Loosely cover the container with a light dish cloth or flour sack and let it sit in a warm, draft-free place. 85°F is ideal. Temperatures hotter than 100°F or so will kill the yeast. The mixture should bubble as it ferments. I usually place the container on roasting pan to collect any overspill.
- Let it sit out (at room temperature) lightly covered, for 5 days, stirring and feeding it once a day. I feed it another 1 part flour (by weight, 4 ounces) to 1 part plain water (by weight, 4 ounces) and stir. (We drop to 4 ounce weight here otherwise the amount will get out of hand volume wise!)
- On the 4th day keep 8 ounces of your starter and DISCARD the balance. Mix 1 part flour (by weight, 8 ounces) to 1 water (by weight, 8 ounces) to the 8 ounces of starter and it should double in size within 4-8 hours. After 12 hours, feed once more with 1 part flour (by weight, 4 ounces) to 1 part plain water (by weight, 4 ounces) and stir.
- Continue to do the same for Day 5 as you did for Day 4 above. The reason we discard on Day 4 and 5 is to strengthen the starter.
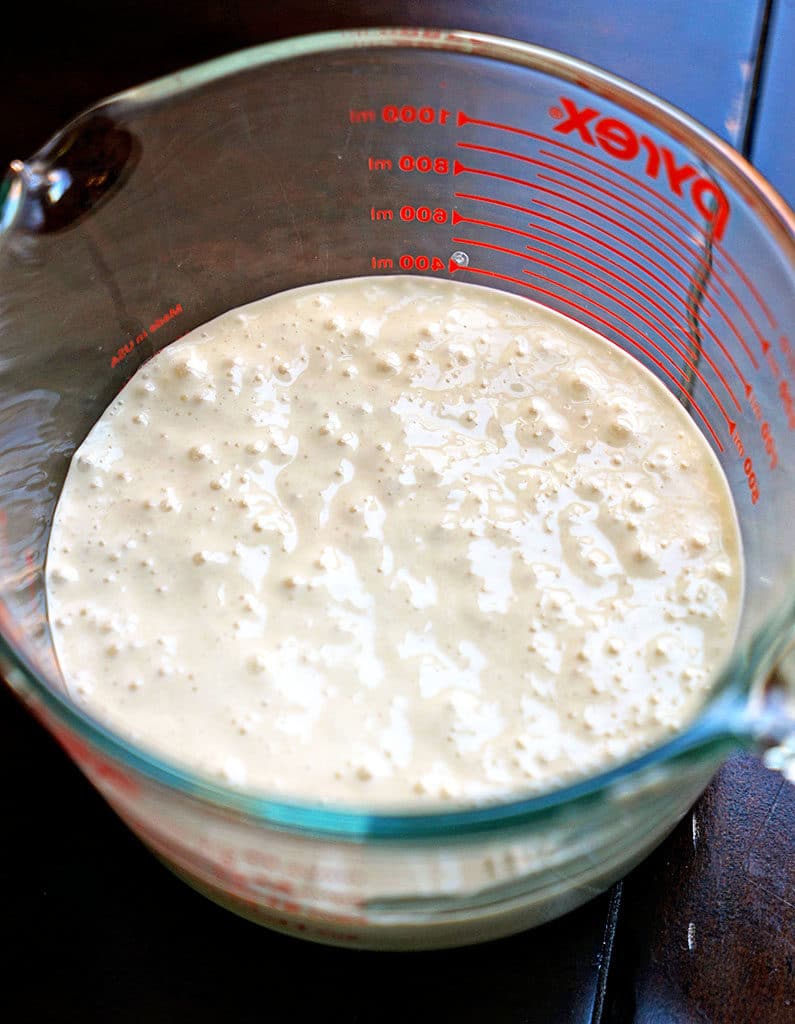
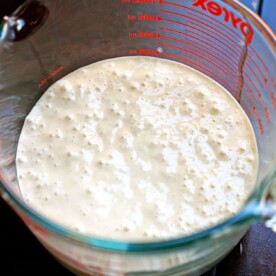
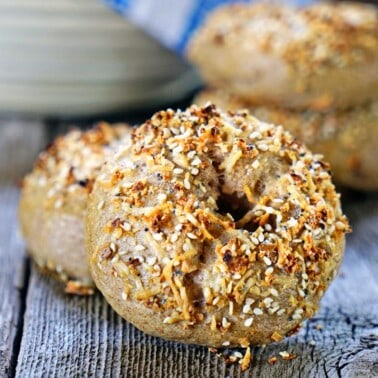
- The starter is ready when it develops a pleasant sour smell and looks bubbly. Once your starter starts bubbling, you can then use it for a batch of pancakes, bread, bagels or store for later use in the refrigerator.
Let me start off by emphasizing that it is so important that you weight your dry ingredients, instead of just scooping out a cup of flour and leveling it off on the measuring cup with your finger or knife. Think volume over weight. There is a difference!
You usually end up putting more than you think in your recipes, sometimes up to an ounce! Ever wonder why that bun was dense, not soft, that cookie crisp not chewy? While exact measurements are not that critical in cooking, baking is another thing. Baking is a science. So weigh on a scale what you need.
Here is a rule of thumb:
- All Purpose flour 1 cup = 4.25 oz
- Bread flour 1 cup = 4.5 oz
- Cake flour 1 cup = 4.0 oz
- Sugar, both granulated and brown 1 cup = 7.0 oz
Another important bit of information: use filtered, warm water because using regular tap water will usually contain chlorine or fluoride, which inhibit and kill yeast growth. No bueno!
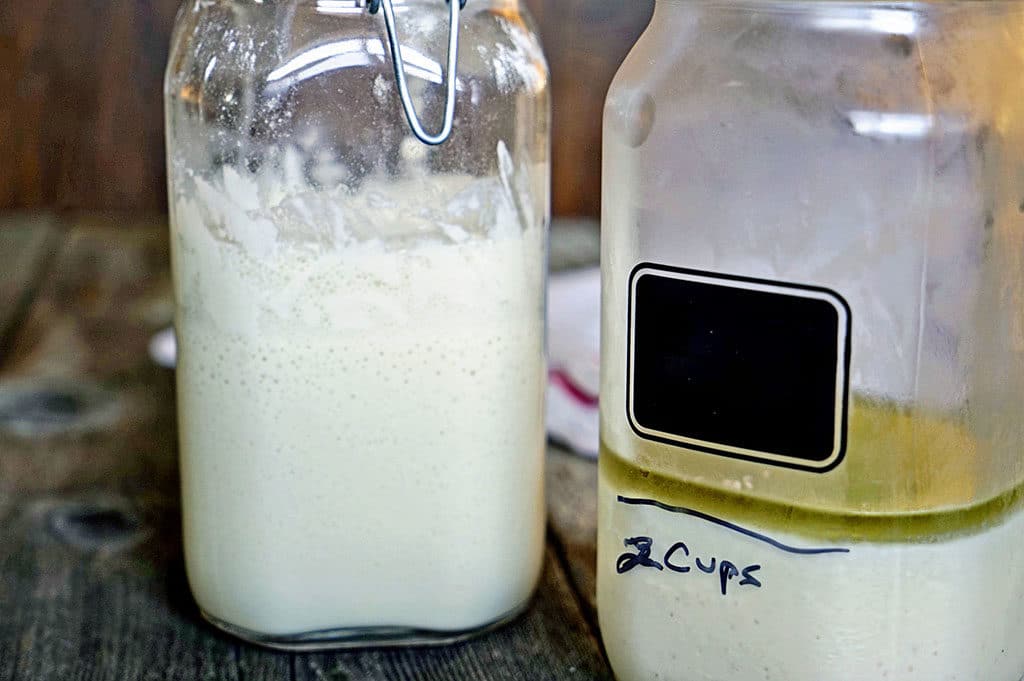
See the jar above on the right with the thin layer of yellow liquid? That’s hooch. In sourdough starters, hooch is a light liquid that is thrown off by a sourdough starter if it is neglected and not fed properly. Bad Kevin, bad!
The jar on the left is an example of a new, healthy, fed sourdough starter. It’s difficult to bring the one on the right back to life, so be good to your starter and feed it regularly and bake! If that’s all I had, I would pour off the hooch and add flour and water to revive. Sometimes it works, sometimes it doesn’t.
Tips When Making a Starter
- As a rule of thumb when using a starter you always need to feed and replenish it. It’s not difficult. Think of it this way, what ever you take out, say 1 cup of starter, it needs to be replaced with 1 part flour (by weight, 4 ounces) to 1 part (potato) water (by weight, 4 ounces).
There is one guy out there who to me is King of Sourdough and his site Breadtopia is packed with incredible, valuable information with how-to, step-by-step videos on sourdough. He is definitely my go to guy for any questions because yeasts and bread are temperamental – bread making is an art after all! Now for those of you who don’t want to go through this sourdough starter process, you can go to his site and purchase a live culture for sourdough starter.
- Another note: Never add more new flour and water to LESS starter.
Example being you have a starter in the refrigerator and it is about 2 1/2 cups total. Your recipe calls for 2 cups of starter. You should not add 2 cups of flour and 1 1/2 cups of water back in to replenish the remaining 1/2 cup of starter. You should always have at least the same amount that you are adding to, follow me? If you do not, you need to build it back up by matching amounts. So you would add 1/2 cup flour and a little less of a 1/2 cup of water. Stir and let it ferment and then do it again, but with 1 cup of flour and 3/4 cup of water and so on. Tedious, but worth it if you want the same sourdough starter strain.
- Also, to test if your starter is strong enough to bake with, meaning there’s enough yeast activity to leaven a loaf of bread, drop a bit of it in a glass of room temperature water. If it floats to the top of the water it’s really active, if it sinks it’s not, and another round of feeding it needs to be done. Otherwise just add a package of dry yeast (follow package directions) if you like to your recipe. What we are making is a starter of sourdough with natural active yeast in it.
Here is a little more background on sourdough from Fernando Padilla, Plant Manager of Boudin Bakery in San Francisco:
“In addition to flour, water, and yeast, your starter also contains bacteria. When these bacteria feed on the sugars in flour, they produce acidic by-products. This is what gives sourdough its sour taste.
Actually, all doughs contain at least some bacteria. So why aren’t all breads sour? In doughs made with bakers’ yeast (the kind you buy in the store), the yeast outnumber the bacteria. Since both compete for the same sugars, the yeast win out, and the bacteria don’t have a chance to produce their acidic by-products. In sourdough, yeast and bacteria are more closely balanced, so the bacteria have a chance to add their flavors to the bread.”
I hope you’ve learned something here. It’s information I’ve gathered over the years and I hope it’s useful. It may seem like a lot to remember, but after you do this a couple times it becomes second nature.
So, if you do not have a starter, here is a recipe. Remember this is a starter, which means some of this total mixture is stored in a jar and kept in the refrigerator for the next batch, a continuation if fed properly.
The Complete Sourdough Series
French Style Round Sourdough Bread
Subscribe to my Newsletter, follow me on Facebook, Pinterest, Instagram and YouTube for all my latest recipes and videos.
How to Make a Sourdough Starter
Ingredients
- 8 oz all purpose flour sifted
- 8 oz potato water - OR warm water 105° to 115°F, (See Note 1)
- 2 tsp salt
- 2 tbsp honey
Instructions
- RULE: 1 part flour (by weight, 8 ounces) to 1 part (potato) water (by weight, 8 ounces)
- Use Potato water or filtered water for this recipe.To make potato water, wash and peel 2 to 3 potatoes. Cut into cubes and add to pot. Cover with water and boil for about 10-15 minutes or until potatoes are soft. Drain potato water into a liquid measuring cup. Let cool to warm before using in your recipe. Use cooked potatoes for another use.
- Mix the 1 part flour (by weight, 8 ounces) to 1 part (potato) water (by weight, 8 ounces) along with salt, honey and stir together in a clean and sterile container (use only glass, glazed ceramic or crockery to hold your starter. No metal or plastic) that can hold two quarts. Loosely cover the container with a light dish cloth or flour sack and let it sit in a warm, draft-free place. 85°F is ideal. Temperatures hotter than 100°F or so will kill the yeast. The mixture should bubble as it ferments. I usually place the container on roasting pan to collect any overspill.
- Let it sit out (at room temperature) lightly covered, for 5 days, stirring and feeding it once a day. I feed it another 1 part flour (by weight, 4 ounces) to 1 part plain water (by weight, 4 ounces) and stir. (We drop to 4 ounce weight here otherwise the amount will get out of hand volume wise!)
- On the 4th day keep 8 ounces of your starter and DISCARD the balance. Mix 1 part flour (by weight, 8 ounces) to 1 water (by weight, 8 ounces) to the 8 ounces of starter and it should double in size within 4-8 hours. After 12 hours, feed once more with 1 part flour (by weight, 4 ounces) to 1 part plain water (by weight, 4 ounces) and stir.
- Continue to do the same for Day 5 as you did for Day 4 above, reason we discard on Day 4 and 5 is to strengthen the starter.
- Good tip to know is when your starter doubles in volume between feedings, it's ready to use for baking. Typically Day 5 or 6 from my experience.
- The starter is ready when it develops a pleasant sour smell and looks bubbly. Once your starter starts bubbling, you can then use it for a batch of pancakes, bread, bagels or store for later use in the refrigerator.
- The starter is ready when it develops a pleasant sour smell and looks bubbly. Once your starter starts bubbling, you can then use it for a batch of pancakes, bread, bagels or store for later use in the refrigerator.
- Feed starter every 2 weeks. If you have more starter and need to feed it discard down to 1 to 2 cups or you will soon start having quite a bit of starter. Mix 1 part flour (by weight, 8 ounces) to 1 part (potato) water (by weight, 8 ounces) to the 8 ounces of starter and it should double in size within 4-8 hours. Build it up per recipe use.
Notes
Nutrition
The information shown is an estimate provided by an online nutrition calculator. It should not be considered a substitute for a professional nutritionist’s advice.


What do I set my oven to when I cook it and how long do I cook it?
Kaedra, you do not bake the starter. It is use din other recipes. See the recipe post with links to those. Each are separate.
I’m so glad I found your blog and specifically this recipe. I grew up on Dad’s sourdough pancakes and waffles served every-other day. I knew the source of his starter and have that recipe but only had a vague memory of the actual pancake making process as that recipe was all in his mind. Unfortunately Dad passed away a few years ago so I couldn’t just call him. I’ve been waxing nostalgic recently and craving some sourdough pancakes. I got the starter going last week using potato water, flour and a dash of sugar. So the hunt was on for a pancake recipe that came close to matching my old memories. I was frustrated to find that most of the recipes talked about making pancakes as a way to use the “waste or excess” starter without talking about salvaging some of the overnight mix for next time. Most of these recipes added ingredients to the overnight mix that I knew were not a part of Dad’s recipe. Finally I stumbled on this recipe and found exactly what I was looking for: a very simple recipe with minimal ingredients and nothing but flour and water added to the starter to stand overnight. Yesterday, with my week old virgin starter, I made a batch of pancakes. The mouth watering memories were fantastic! Pancakes just like Dad used to make… I wish I had gotten the recipe directly from him, but at least I had enough memories of watching him cook that I knew what to look for.
Thank you for sharing and bringing real pancakes back into my life!
Reading comments like this make my day Aaron, thanks so much for taking the time t come back and let me know! Cheers to Dad and Sourdough pancakes! 🙂
I followed your recipe for the starter and am so happy with it! Thank you.
You seem to really like the expression “rule of thumb” – it’s a fairly common one but one that has an unsavory origin – look it up. And I hope you’ll reconsider using it – I did!
Glad you enjoyed the starter HB, thanks for letting me know! Interesting fact, I looked it up. Cheers!
I learned from Emeril Lagasse that if you are going to be away from home for three or more days you can freeze your sour dough starter. Cover it air tight, with clear wrap for example and put it in the freezer. Thaw it out in you fridge and allow it to work for two days before you use it. I have done it twice over the past three months and the starter came back perfectly.
DK, that is great news, thanks so much for sharing that. I never would have thought. 🙂